Exterior Basement Waterproofing Explained for First-Time Homeowners
Buying a home with a basement often feels like gaining bonus space. It might become a workshop, a playroom, a home gym, or simply the place where all the things that do not fit upstairs quietly collect. Then the first hard rain hits, and a dark stain appears low on the wall. Maybe there is a musty smell that was not there in dry weather. Maybe the previous owner painted the walls bright white, and now you understand why.
For first-time homeowners, exterior basement waterproofing can sound like a major, mysterious project, something contractors discuss with a lot of pointing and jargon while you try to keep up. It is actually easier to understand once you know one basic truth: water is not trying to flood your basement out of nowhere. It is usually following the path of least resistance through soil, foundation walls, joints, and weak points around the house. Exterior waterproofing is about stopping that water before it gets inside.
That distinction matters. Plenty of basement moisture problems get managed from the interior. Some are handled well that way. But exterior work addresses the water at the source, which is why it is often the strongest long-term fix when a basement has repeated seepage, hydrostatic pressure, or wall leakage below grade.
What exterior basement waterproofing really means
Exterior basement waterproofing is a system, not a single product. Homeowners sometimes think it means brushing black tar on the outside of the foundation and calling it done. That used to be common, and in some cases a damp-proof coating is still part of the assembly, but true waterproofing is broader than that.
A proper exterior system usually involves excavating soil around the foundation down to the footing, cleaning and inspecting the wall, repairing cracks or surface defects, applying a waterproof membrane, protecting that membrane, and improving drainage with a footing drain or perimeter drain that directs water away. The goal is twofold: block water from entering the wall and relieve the pressure of water collecting against it.
Pressure is the part many homeowners do not think about. Concrete and masonry look solid, and they are, but soil around a foundation can hold a surprising amount of water. After repeated rain or spring thaw, that wet soil pushes moisture against the basement wall constantly. If the drain tile is clogged or missing, the problem gets worse. Tiny pores in concrete, cold joints, tie holes, and hairline cracks can all become entry points over time.
That is why interior paint-on sealers so often disappoint. They may improve appearance for a while, but they do not remove the water pressing against the wall from the outside. They are treating the symptom after the wall is already wet.
Why basements leak in the first place
Most leaks come from a handful of common conditions. Sometimes one issue causes the trouble. More often, two or three smaller issues combine into a bigger problem.
Poor grading is one of the usual suspects. If the ground slopes toward the house instead of away from it, rainwater collects near the foundation. Add short downspouts or overflowing gutters, and you have a steady supply of water soaking the same area every storm.
Older homes often have aging drain tile systems made of clay, corrugated pipe, or materials that have partially collapsed or filled with silt. Even newer homes can have trouble if the original installation was careless, if filter fabric was omitted, or if tree roots found their way in.
Foundation cracks are another entry point, but they are not all equal. A thin vertical shrinkage crack may leak only during heavy rain and may be repairable without full-scale waterproofing if the drainage outside is otherwise sound. A stair-step crack in block foundation walls, or repeated leakage along the wall-floor joint, suggests a different pressure pattern and deserves closer evaluation.
Then there is the hidden variable that surprises first-time owners: local soil type. Clay-heavy soils swell when wet and hold water longer than sandy soils. That means water stays against the foundation longer, increasing the chance of seepage. I have seen houses with no visible issues in August look very different in late March after snowmelt and back-to-back rains. Same foundation, same house, very different moisture conditions.
Signs that point toward exterior waterproofing
Not every damp basement needs excavation. But some signs strongly suggest that outside work should be on the table.
If you see water entering through foundation walls, especially in multiple locations, exterior failure is likely part of the picture. If leaks appear after moderate rain rather than only extreme storms, the drainage burden around the house may be too high. Efflorescence, that chalky white residue left when moisture moves through masonry, is another clue that water is traveling through the wall itself.
Musty odor alone is not enough to justify excavation, since high indoor humidity can also create that smell. But combine odor with peeling paint, wall staining, warped paneling, or recurring mold growth along exterior walls, and the case gets stronger.
One pattern that contractors notice quickly is this: if the basement stays mostly dry except for isolated floor seepage near a single crack, a targeted repair may work. If the basement shows broad moisture history along long wall sections, the outside drainage and waterproofing system are often failing as a whole.
What the job usually looks like
Exterior basement waterproofing is disruptive, but it is not mysterious. Understanding the sequence helps homeowners ask better questions and compare estimates more intelligently.
The crew first marks utilities and plans access. Excavation follows, usually around the affected wall or around the full perimeter depending on the scope. On many homes, that means digging down 7 to 9 feet, sometimes deeper, to reach the footing. The soil is stockpiled or hauled away depending on space and condition.
Once the wall is exposed, the real diagnostic work begins. This is often the moment when hidden problems become visible: open cracks, honeycombed concrete, deteriorated mortar joints, old patch material that failed, or drain tile packed with mud. A good contractor does not rush past this stage. Surface prep matters because membranes adhere only as well as the substrate allows.
Cracks and voids are repaired first. Then comes the waterproofing layer. Different contractors use different systems, liquid-applied membranes, sheet membranes, or combinations with drainage boards. There is no single magic material. What matters is compatibility, continuity, and installation quality. A premium membrane poorly applied is still a poor waterproofing job.
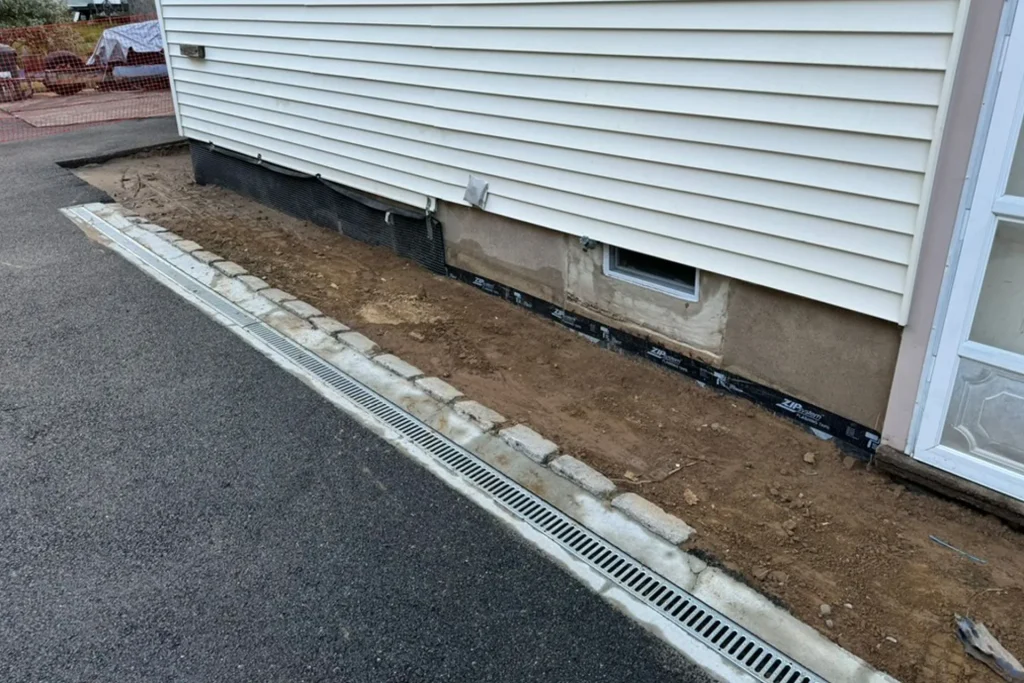
Drainage protection goes over the membrane in many assemblies. This can include a dimple board or similar protection layer that prevents backfill damage and channels water downward toward the drain. At the footing, perforated drain pipe is installed or replaced, usually surrounded by washed stone. The pipe directs water away from the foundation, either by gravity to daylight where site conditions allow, or to a sump system in some configurations.
Backfilling happens last, and this phase also deserves attention. Heavy equipment, poor compaction practices, or reused debris-filled soil can create future settlement and grading issues. The final surface should slope away from the house so roof runoff and surface water do not head right back to the repaired area.
The difference between damp-proofing and waterproofing
This is one of the most important distinctions a first-time homeowner can learn, because it shows up in estimates all the time.
Damp-proofing is designed to resist soil moisture. Waterproofing is designed to resist water under pressure. Builders often apply a basic asphaltic coating to new foundations as damp-proofing. It is better than bare concrete, but it is not the same as a robust waterproof membrane system with drainage components.
If a contractor says they will "seal the foundation," ask what product they use, how thick it is applied, whether cracks are repaired first, whether a drainage board is included, and whether drain tile will be installed or replaced. Those answers tell you whether you are getting a cosmetic moisture barrier or a system meant to address persistent water intrusion.
This is where homeowners sometimes get trapped by low bids. A thin coating without drainage improvements can look affordable on paper. It can also fail to solve the problem that prompted the work in the first place.
How exterior waterproofing compares with interior solutions
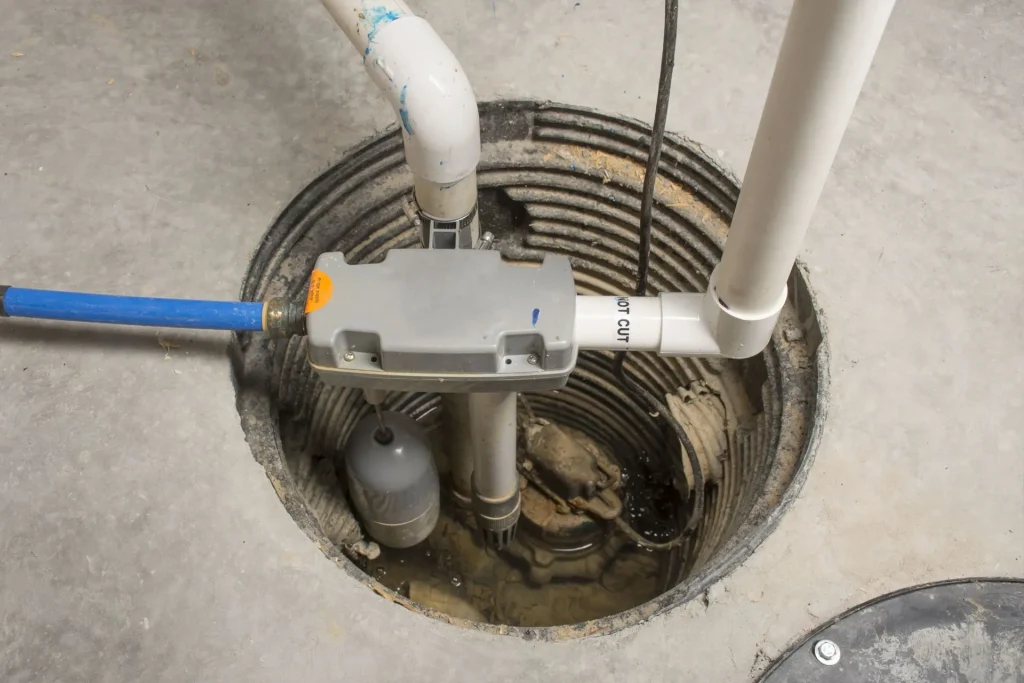
Interior basement waterproofing has its place. In some houses, especially where exterior excavation is difficult because of porches, garages, tight lot lines, or mature landscaping, an interior drain system may be the practical choice. Interior systems typically manage water after it enters or as it reaches the wall-floor joint, channeling it to a sump pump.
That can work well for certain conditions, and reputable contractors install excellent interior systems. But it is worth being clear about the difference. Interior systems usually do not stop the wall from getting wet on the exterior side. They manage the water and protect the basement interior from visible flooding. Exterior systems aim to stop the water load from affecting the wall in the first place.
The trade-off is simple. Exterior work is usually more invasive and more expensive, but it addresses the source. Interior work is often less disruptive and less costly upfront, but it may leave the foundation wall exposed to long-term moisture from the outside. That does not automatically make interior systems wrong. It just means they solve a different part of the problem.
Cost, and why estimates vary so much
Homeowners naturally want a per-foot number, but exterior waterproofing costs swing widely because no two sites are the same. Depth, access, soil type, foundation condition, disposal needs, hardscape removal, and local labor rates all affect price. A straight run along one accessible wall is a very different project from a full-perimeter excavation around a deep basement with decks, AC units, walkways, and utility obstacles.
In many markets, partial exterior waterproofing may land in the several-thousand-dollar range, while full-perimeter systems can move well into five figures. On difficult sites, costs climb further. That can be hard to hear, especially for a first-time buyer already juggling repairs, but basement water problems are one of those issues that rarely become cheaper by waiting.
What deserves extra scrutiny is an estimate that is dramatically lower than the others without a clear explanation. Sometimes the contractor is simply more efficient. More often, something has been omitted, thinner materials are being used, excavation is shallower than it should be, or drainage work is not fully included.
When reviewing bids, pay attention to scope before price. One estimate may cover excavation, crack repair, membrane, protection board, drain replacement, gravel, and backfill. Another may mention "waterproofing wall" and little else. Those are not equivalent.
Questions worth asking before you sign
A short conversation can reveal a lot about the contractor’s approach. Ask how they diagnose the water source, not just how they plan to coat the wall. Ask whether the footing drain will be tested, replaced, or tied into an existing discharge. Ask what happens if they uncover structural cracking, soft spots, or buried debris once excavation begins.
These five questions usually lead to useful answers:
- What evidence tells you exterior waterproofing is the right fix for this basement?
- What exact membrane and drainage products will you install?
- Will you replace or repair the footing drain, and where will the water discharge?
- How will you protect landscaping, walkways, and nearby structures during excavation?
- What is excluded from the estimate if hidden damage is uncovered?
If the answers are vague, that is a signal. Good contractors know homeowners are making a big decision. They should be able to explain their reasoning in plain language.
What can go wrong on a poorly executed job
The biggest failure is incomplete water management. A wall can be beautifully coated, but if water still collects at the footing because the drain is absent, clogged, or pitched incorrectly, the system is compromised.
Backfill damage is another preventable problem. Some membranes tear easily if not protected. Once the trench is filled, a damaged section is hidden and difficult to verify. This is why many experienced installers use a dedicated protection layer rather than trusting the membrane alone.
Discharge mistakes also create repeat headaches. If drain water is sent to a poor location, it can cycle back toward the house or overload another area of the yard. https://zionuogn996.quantlynix.com/posts/basement-waterproofing-for-multi-level-homes-and-split-levels I have seen beautifully waterproofed walls paired with downspouts that dump right beside them. No membrane should have to fight against bad site drainage.
There is also the landscaping issue, which sounds cosmetic until you live through it. Exterior excavation can disturb patios, shrubs, fences, irrigation lines, and access paths. A professional crew plans for restoration. A careless one leaves the homeowner with a waterproof basement and a battered yard.
Cases where exterior work may not be necessary
It is worth saying plainly that not every moisture problem below grade calls for excavation. Condensation on cold pipes, high basement humidity in summer, and isolated seepage from a single non-structural crack can sometimes be handled with dehumidification, targeted crack injection, gutter correction, or grading improvements.
I have seen basements "diagnosed" for major waterproofing when the main issue was two clogged downspouts and flower beds built above the siding line. Once those were corrected, the basement stayed dry through multiple seasons. That is why diagnosis comes first. If a contractor recommends full exterior Basement Waterproofing without spending time on runoff patterns, grading, and the specific leak path, get another opinion.
How homeowners can reduce the water load even after waterproofing
Even a well-built system performs better when the house sheds water efficiently. Waterproofing should not become an excuse to ignore the basics around the exterior.
The most effective habits are simple:
- Keep gutters clear and repair leaks promptly.
- Extend downspouts well away from the foundation, often 6 to 10 feet if site conditions allow.
- Maintain positive grading so soil slopes away from the home.
- Avoid overwatering planting beds against foundation walls.
- Watch for settling after backfill and add soil as needed to preserve slope.
These measures are inexpensive compared with excavation, and they reduce stress on the foundation year after year.
What first-time homeowners should expect during and after the project
A realistic expectation helps. The yard will be messy during the job. There will be excavation equipment, exposed soil, and noise. Access to parts of the property may be limited for several days, sometimes longer depending on weather and scope. If the repair is near an entry walkway or driveway, plan around that before work starts.
After the job, the area may settle somewhat over time, especially after heavy rain. That is normal to a degree, because disturbed soil compacts. Responsible contractors explain this and may return for touch-up grading if their agreement includes it. New sod or seed takes time, and restored landscaping may not look mature right away.
What you should expect, though, is clarity. You should know where the water goes, what materials were installed, what warranty applies, and what maintenance remains your responsibility. Keep photos if the contractor provides them. Since the system is buried, documentation is valuable for future resale and for any later work around the foundation.
A final practical way to think about the decision
Exterior basement waterproofing is not glamorous. Homeowners do not show it off the way they show a remodeled kitchen. But when it is needed, it protects structure, finishes, indoor air quality, and peace of mind all at once. It can also preserve the real usefulness of a basement. Dry storage stays dry. Flooring survives. Framing and insulation are less likely to become mold issues. Future finishing projects become realistic instead of risky.
For a first-time homeowner, the smartest mindset is not "How do I get the cheapest waterproofing?" It is "What is actually causing the water, and what fix matches that cause?" Sometimes the answer is a grading correction and new downspout extensions. Sometimes it is an interior drainage system. Sometimes the honest answer is full exterior Basement Waterproofing because the wall, the drain, and the surrounding soil conditions all point there.
If you approach the problem that way, with a little patience and a lot of good questions, the project stops feeling mysterious. It becomes what it really is: a practical building repair, one that works best when water is intercepted outside, pressure is relieved before it builds, and the foundation is given the protection it should have had all along.
ARD Waterproofing
98 Smull Ave, West Caldwell, NJ 07006, United States
+1 917-691-8411
FAQ About Basement Waterproofing
Can you 100% Waterproof a Basement in West Caldwell?
A properly designed system can substantially reduce basement water intrusion, but no method can promise protection against every flood, equipment failure, or future change in site conditions. The first step is identifying whether moisture comes from surface runoff, groundwater, plumbing, or condensation. Solutions may include grading and gutter improvements, drainage, foundation repairs, and a sump system. Review the specific coverage and exclusions of any written warranty.
How much does it cost to professionally waterproof a basement in NJ?
There is no single price that fits every basement. Cost depends on the cause of the leak, the area needing work, access, excavation requirements, drainage design, sump equipment, and restoration of disturbed finishes or landscaping. Request an on-site assessment and an itemized written estimate that explains the scope, exclusions, and maintenance requirements before comparing proposals.
How long does foundation waterproofing last in West Caldwell, NJ?
Service life varies with the waterproofing materials, installation quality, soil and water conditions, and maintenance. Drainage components and pumps may require servicing or replacement even when other parts of the system remain functional. Keep gutters, drainage outlets, and sump equipment maintained, and have recurring leaks or changes in foundation condition assessed. Ask for product-specific expectations and written warranty terms rather than relying on one lifespan for the entire system.